Getting BSNL broadband connection is one thing and then make run is another big task. Its not that BSNL dataone connection was my first choice but as they say beggars are not choosers. With limited option to pick from (precisely two BSNL and Tata Indicom) I reluctantly picked the state owned giant.
I also have a hidden agenda behind the same (No its not to please my father in law who works with another former state owned telecom giant MTNL), the bill generated for BSNl act as a legitimate address proof. Many of you would be aware of my plight while trying to reissue my passport where i run from pillar to post to prove my identity.
Anyways, BSNL connection started throwing tantrum from the day of installation only (including by the linesman who would ask for regular chai-pani for activation). The connectivity was erratic and connection tag slow. I relied on the internet god to check the connectivity. But little did I realize that there more to internet beyond google. Everything will work but for Google and related sites.
Here enters the Internet ka Baap, BSNL dataone, which for reasons best known to him don’t gel with google. I resorted to other search engines and realize this is a very common problem for all BSNL broad band users who tries to access google, orkut, gmail and other google sites.
Doing some more research it suggests , i found following stuff on internet.
“DNS stands for Domain Name Server. When you type www.google.com, the DNS server converts the name into an IP address of Google. Then it follows the IP address to fetch you the webpage.
Now, due to a defective DNS server system, your typed address can not get resolved into IP. So you reach nowhere.”
This was really frustrating as life seems to be standstill for me on internet without google. But surprisingly this complicated and widespread problem has a quick solution.
SOLUTION (Simple) :
BSNL DNS is the root cause of the problem, so simply change it to DNS that works.
IMPLEMENTATION (Simpler) :
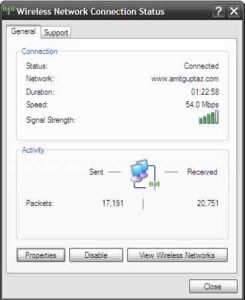
a) Double click the LAN icon on your system tray
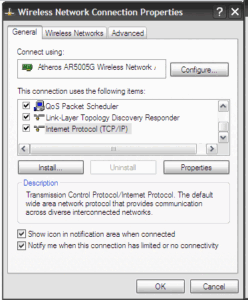
b) Go to Properties > Click on Internet Protocol (TCP/IP)
c) Choose “Use the following DNS server addresses”
d) Update 208.67.222.222 as preffered DNS server and 208.67.220.220 as alternate DNS server
e) You’re DONE
These DNS are provided by OpenDNS . I have actually experience a better connectivity and page rendering using these settings. HAPPY SURFING….


Leave a Reply